Showing posts with label tutorial. Show all posts

Monday, July 11, 2011

Super quick icecream recipe

We have really been making a huge effort to eat things that are organic or made with as many organic, hormone free ingrediants as possible. One of the most expensive things is organic icecream. That stuff is crazy pricey! So I was super exited when I saw this tutorial about home made icecream! Last night I decided to give it a shot and see how it went. To my surprise it came out really good!

Things you will need:

1C Half & Half
2T Sugar
1/2t Vanilla
1/2C Salt
Ice
1 Large baggie
1 Small baggie


Step 1- Gather your suppplies


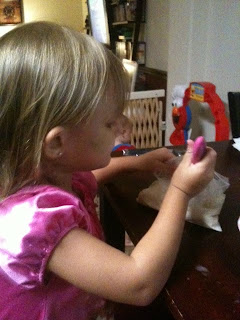
Step 2- Mix Half & Half, sugar and vanilla in the smaller baggie. I used a sandwich size bag and it had plenty of room.


Step 3- Fill the larger baggie with ice and dump in the salt. I used canning salt, but rock salt or table salt should be fine also. The salt helps the ice freeze the cream faster. Real scientific, I know.


Step 4- Put the smaller baggie in the bigger baggie and shake the heck out of it. It takes about 10 minutes of shaking to get the job done. I tried to give this job to Kaelin but she didn't want any part of doing the hard work. Make sure the smaller bag is sealed really well otherwise you'll end up with salt icecream.


Step 5- Open the bags and enjoy! I put ours in the freezer while we ate dinner to let the icecream really harden. It is really good as vanilla but you could easily make another flavor by adding ingrediants such as chocolate, nuts, fruit or any other thing you like in your icecream.


This recipe is extremely easy and a very quick, kid friendly one. We don't have an icecream maker so I've never made any before. It's nice to be able to make some whenever we need it. Plus it's a small enough amount that I don't have to worry about super expensive icecream getting freezer burnt in the freezer. I could totally see this being the kind of thing we can do for a family picnic or even a birthday party. Set out the supplies and each guest can make their own with whatever flavors the want. Yum!

Saturday, August 7, 2010

How not to make cake balls

The other day I was drunk got the crazy idea to do a fun baking project with the kids. I went rummaging through the pantry and found a cake mix and some icing. A ha! We'd make cake balls! So here's the low down on how to them. 


 Remove jewelry. You'll thank me!


Tuck assistant 0.5 into his highchair and give him a toy. 


Bake a cake and let it cool just a little bit. You'll need to have a large mixing bowl and spoons ready also. If you want to keep your sanity, stop here. Just ice the cake and call it a day!


Have assistant 1 (dressed in their "baking outfit") go crazy on the cake with a wooden spoon. You want to get it nice and smashed. 


Put the cake crumbs into the large bowl and mix in a half of a container of frosting. You want the cake moist and sticky but not gooey or your balls will taste under cooked. 


You're supposed to roll your balls by hand, but I cheated and used a cookie dough spooner thingy.


Then you put all of your balls into a cake pan or on a baking sheet so you can freeze them You want them firm so you can cover them easily, but not frozen.


Uh oh! Assistant 0.5 needs some attention too!


Ahhhh, much better!


While your balls are in the freezer gather your decorating supplies. We used candy wafers but chocolate chips would work too. We also used sprinkles colored sugar. 


Melt your candy wafers or chocolate chips in the microwave. But follow the destructions directions and don't do what I did and burn them. Yuck! And if you do, throw it out and make a new batch. 


Get some plastic forks and break the center tines off. This will make for nice dipping forks. Plus you get to laugh because your forks look like Batman!


Next you use your forks to dip the cake balls into your coating of choice. I found it easiest to do this myself. Distract assistant 1 by letting them wash your dishes in the sink. 


When that doesn't last long let them get into your decorating sprinkles. What's a little sugar, right? Try not to let them eat too many though because you do need some sprinkles to decorate your cake balls with. 


In theory you'll have beautifully covered balls of cake when all is said and done. However, this is all we got. I was having a hard time getting the wafers to melt nice and smooth and I think the cake balls were too cold because the candy wouldn't stay melted and just clumped as soon as I dropped the balls in. So we gave up and Kaelin ate the rest of the balls straight from the freezer sans coating.